

Amazon LightsailにWordPressを構築し、独自ドメインのhttpsで接続するまでの流れを解説します。ドメインはお名前.comで取得しているので、それ以外で取得している場合はそこだけ読み替えてください。
インスタンスの作成
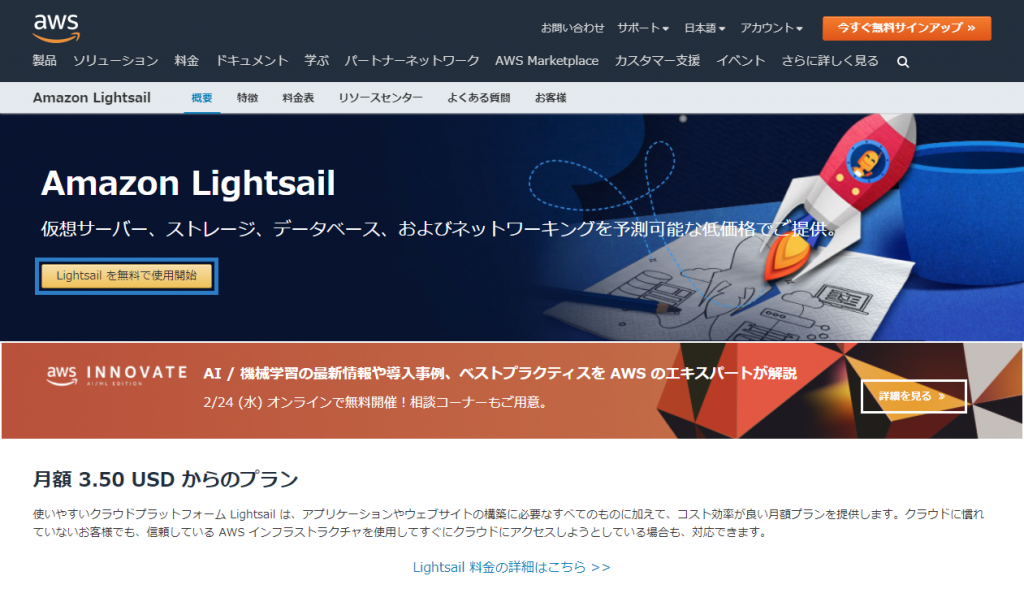
まずはここからLightsailの管理画面にアクセスします。AWSアカウントを作成していない場合は併せて作成してください。
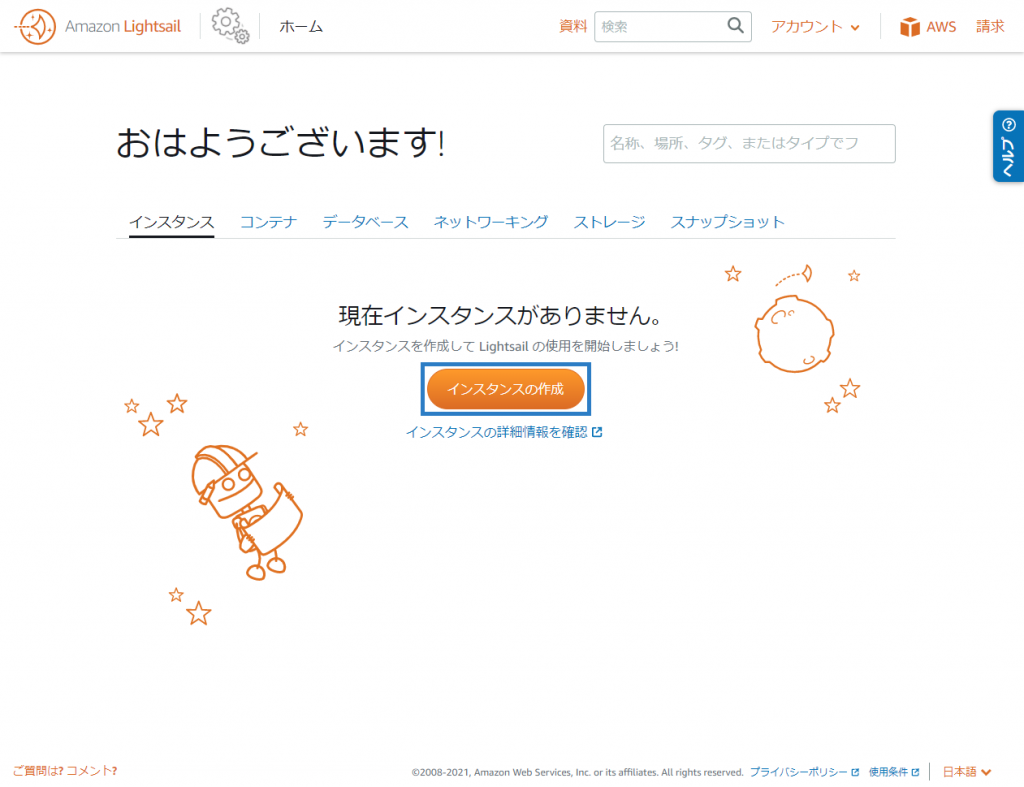
管理画面にアクセスできたら「インスタンスの作成」からインスタンスの作成を開始します。
インスタンスイメージは「Linux/Unix」の「WordPress」を選択してください。

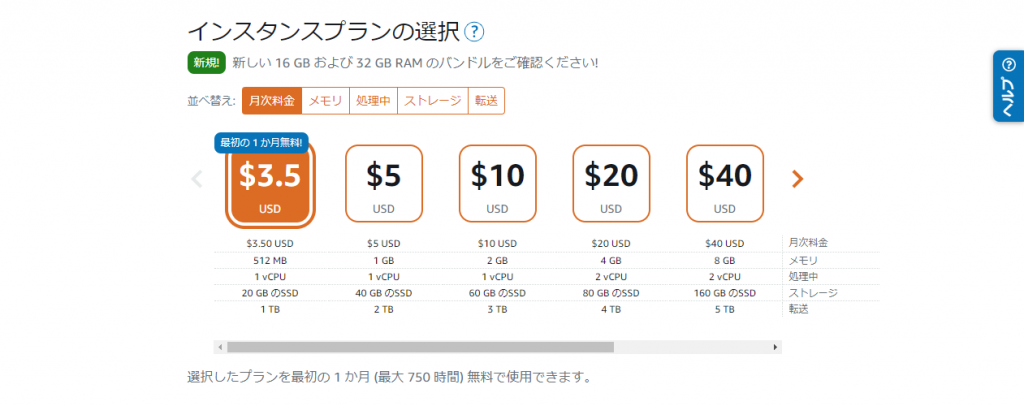
インスタンスプランの選択ですが、最初は一番安いプランでいいかと思います。新規の場合は1か月無料ですし、十分軽快に動きます。
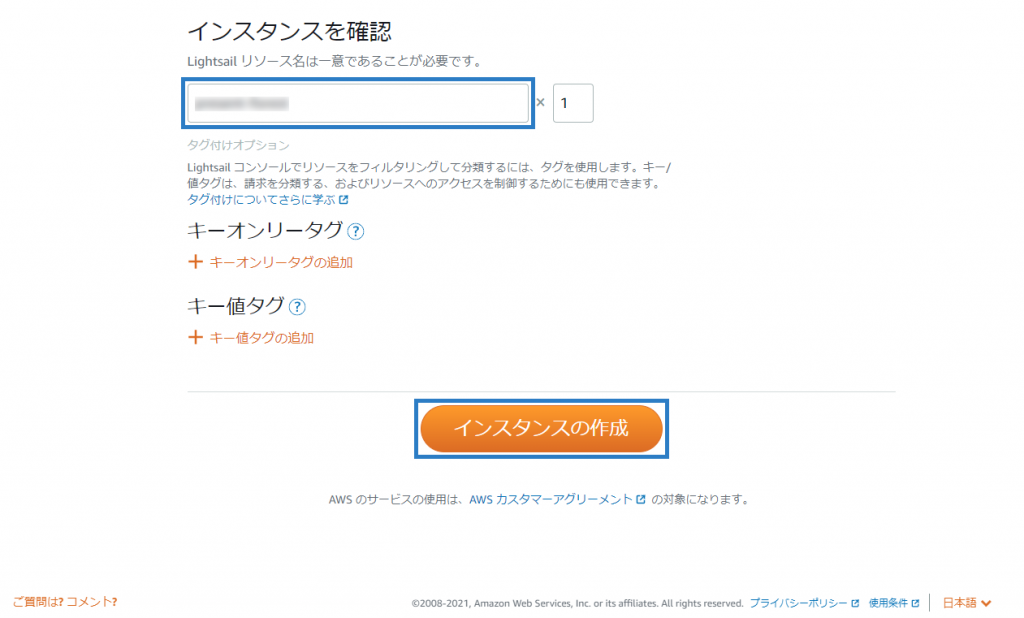
リソース名はデフォルトのままでも問題ありませんが、ドメイン名にした方が管理しやすいのでここではドメイン名を入力します。その後「インスタンスの作成」をクリックしてください。
上図で取り上げていない項目についてはデフォルト値で問題ありません。
静的IPの作成
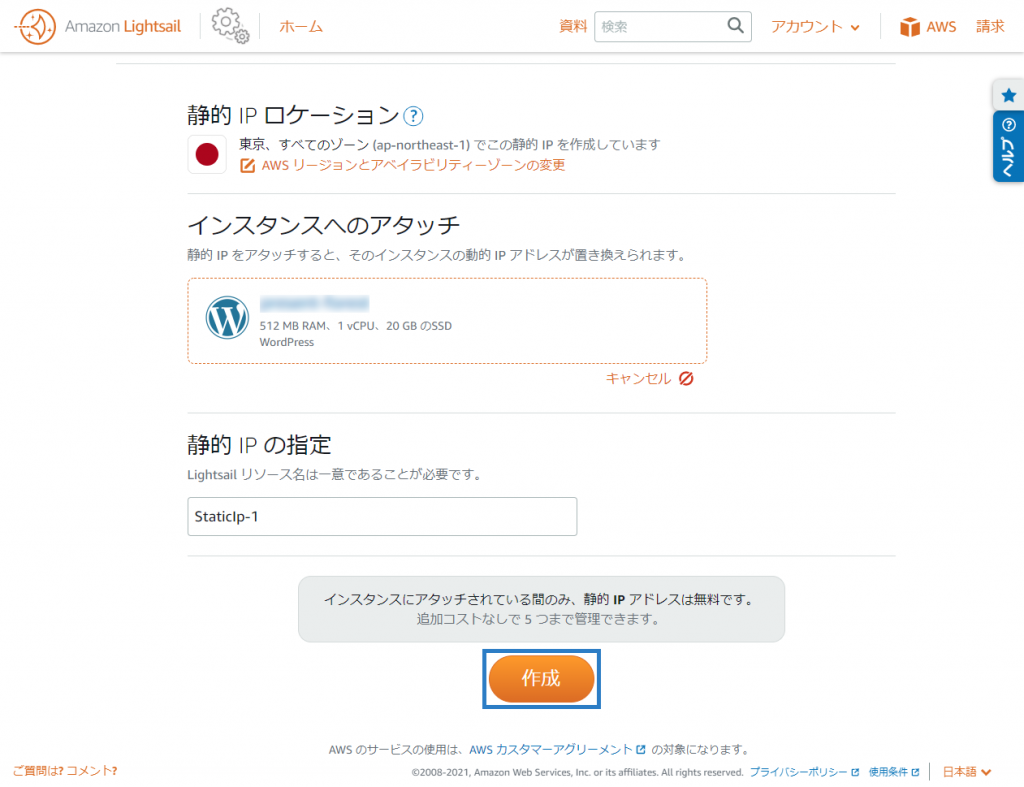
次にスタティックIPを取得します。「ネットワーキング」タブから「静的IPの作成」を選択してください。
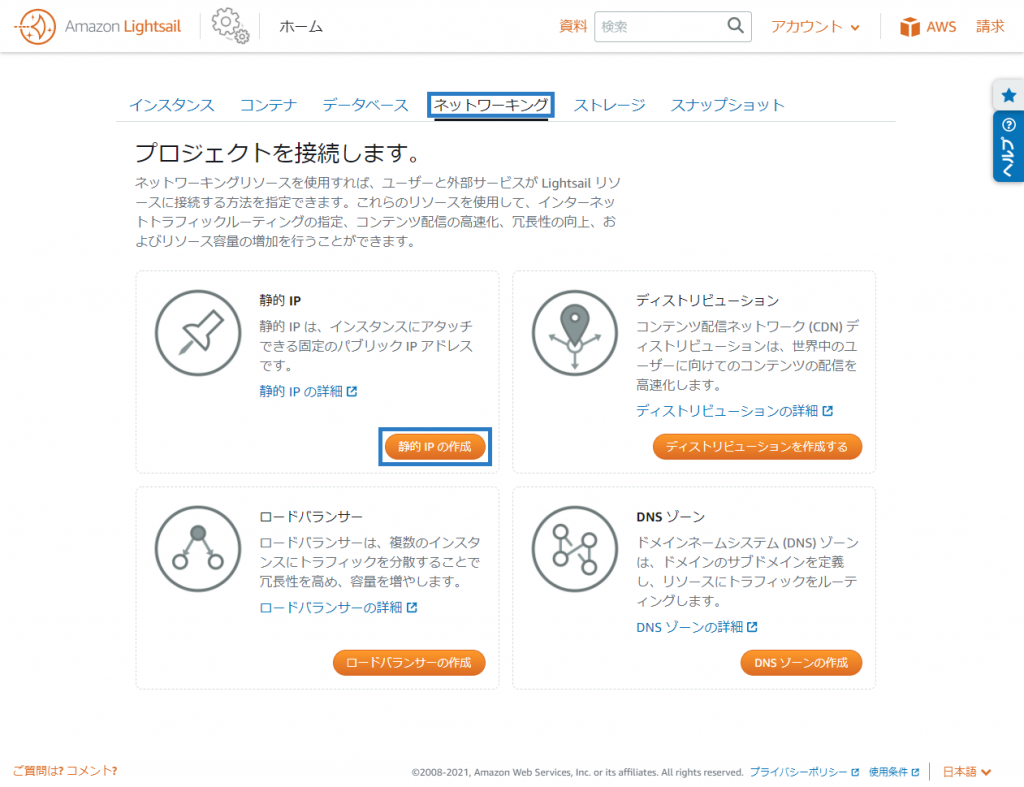
そのまま「作成」をクリックします。
独自ドメインの設定
独自ドメインの設定はDNSゾーン作成→ネームサーバ変更→Aレコード追加という流れで行います。
DNSゾーンの作成
「ネットワーキング」タブから「DNSゾーンの作成」を選択します。

そのまま「DNSゾーンの作成」をクリックします。

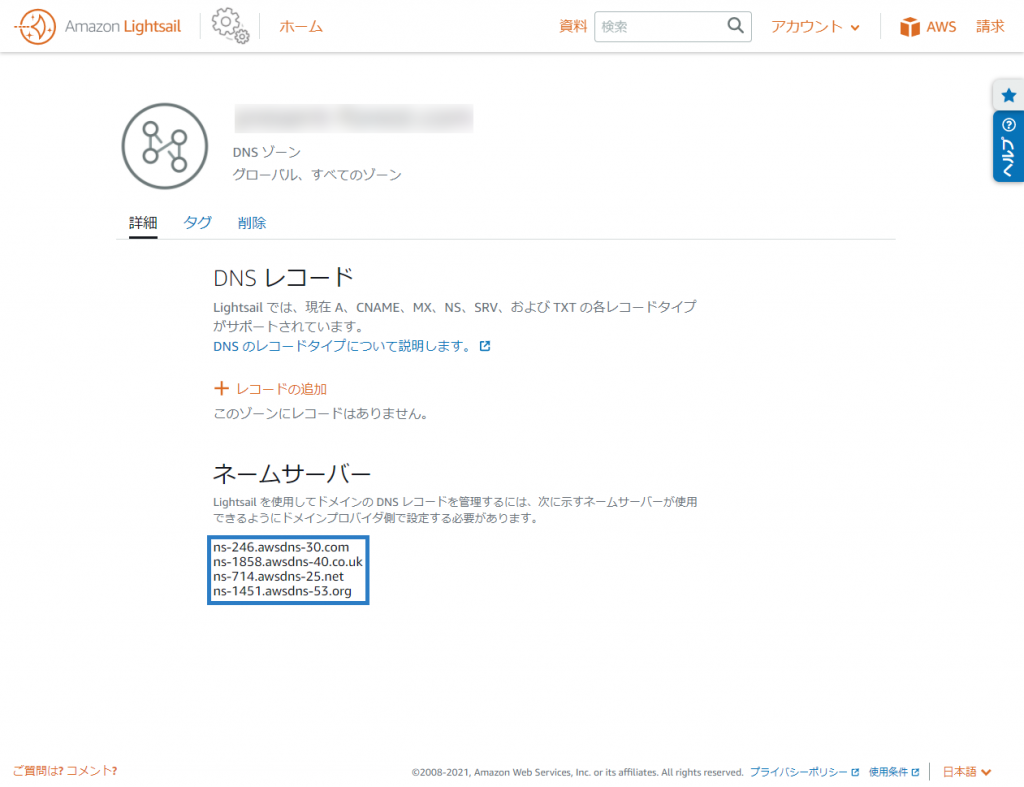
ネームサーバの変更
次にドメインのネームサーバを変更します。まずはDNSゾーンの作成時に表示される「ネームサーバー」を控えておきます。
お名前.comにアクセスし「ネームサーバーの変更」をクリックします。

Lightsailに紐づけたいドメイン名を選択して、「その他のネームサーバーを使う」欄に先ほど控えたネームサーバーを全て入力します。

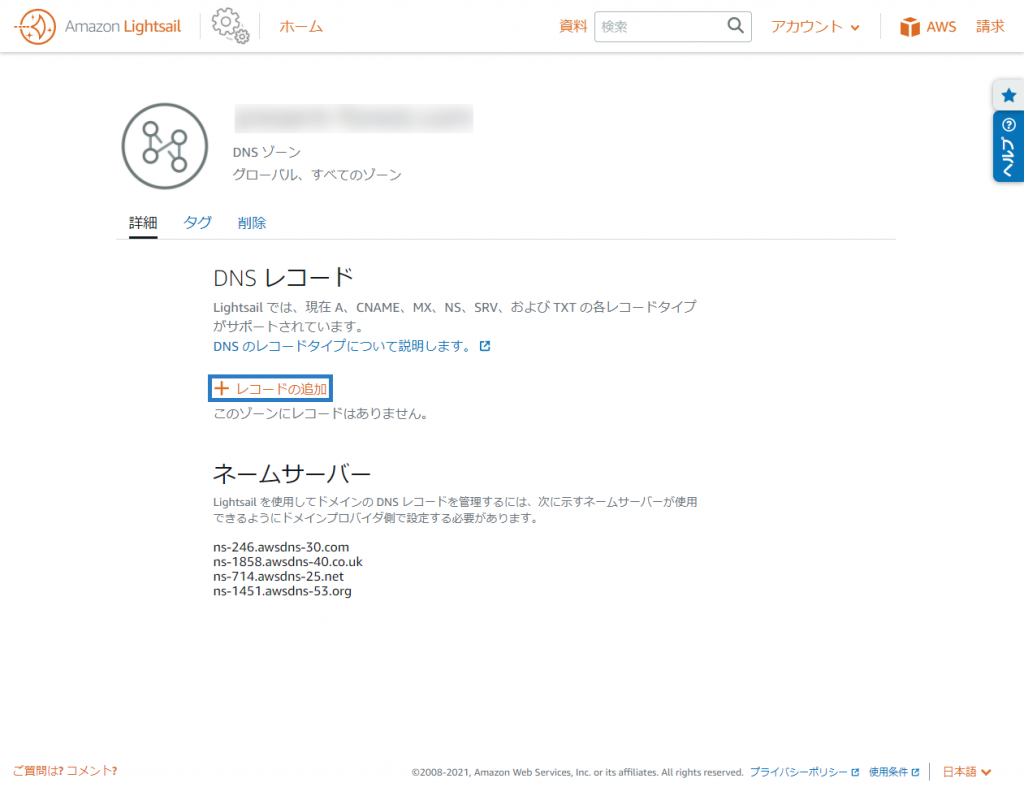
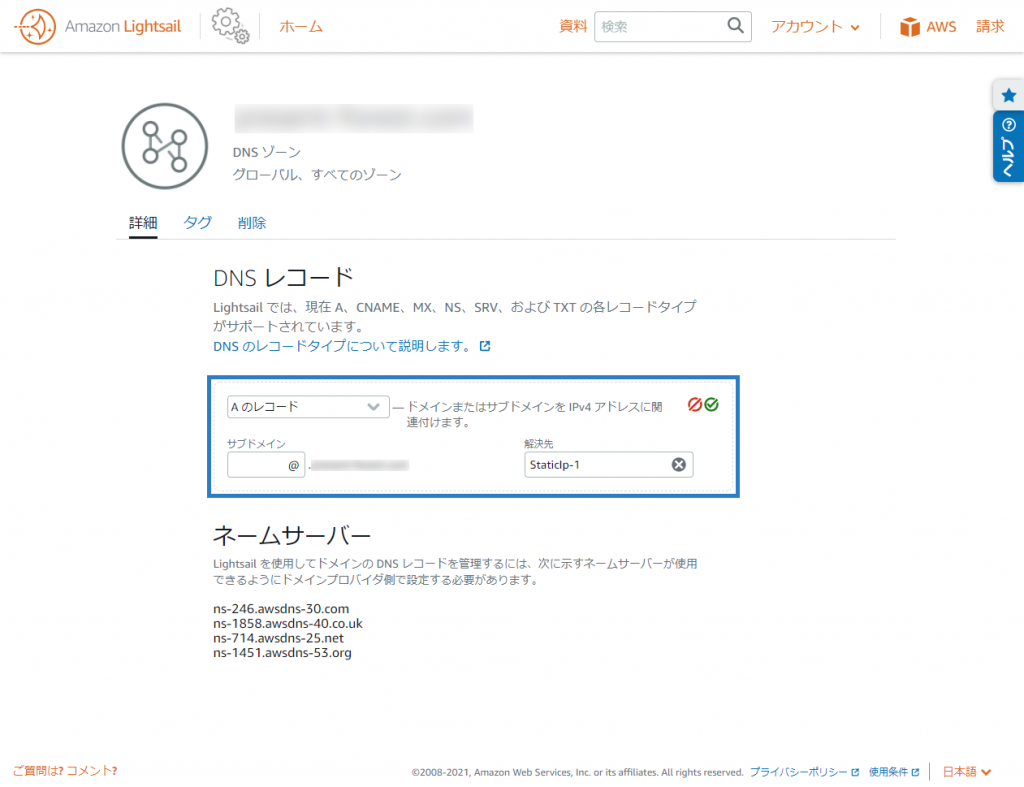
Aレコードの追加
Lightsailの画面に戻り、DNSゾーンの「レコードの追加」をクリックします。
レコードの種類を「A のレコード」、解決先として先ほど作成した静的IP「StaticIp-1」を選択します。
サブドメインに空白はNGなので、サブドメイン無しでWordPressにアクセスさせる場合はサブドメインとして「@」を入力します。サブドメイン有りの場合、例えばwww.ドメイン名でアクセスさせる場合は「www」と入力します。
全て入力し終わったら右上の緑のチェックマークをクリックしてください。
WordPressの設定
ここまでの段階でWordPressに独自ドメインでアクセス可能なので、実際にアクセスして最低限の設定を行います。
WordPressへログイン
WordPressにログインするために、まずは初期ユーザのパスワードを確認しておく必要があります。Lightsail管理画面からサーバのコンソールに接続してください。

コンソールで以下のコマンドを入力すると、デフォルトユーザである「user」のパスワードが出力されます。
cat bitnami_application_password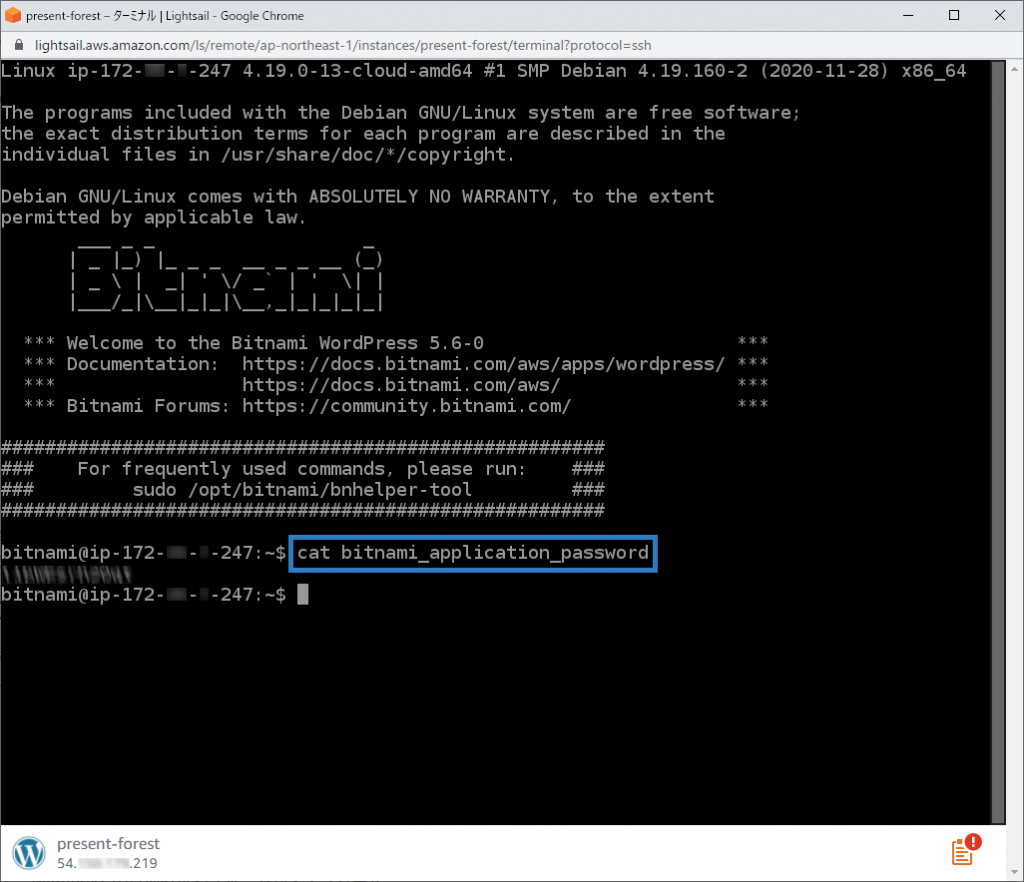
WordPressのログイン画面(http://ドメイン名/wp-admin)にアクセスし、「user」とこのパスワードを入力してログインしてください。
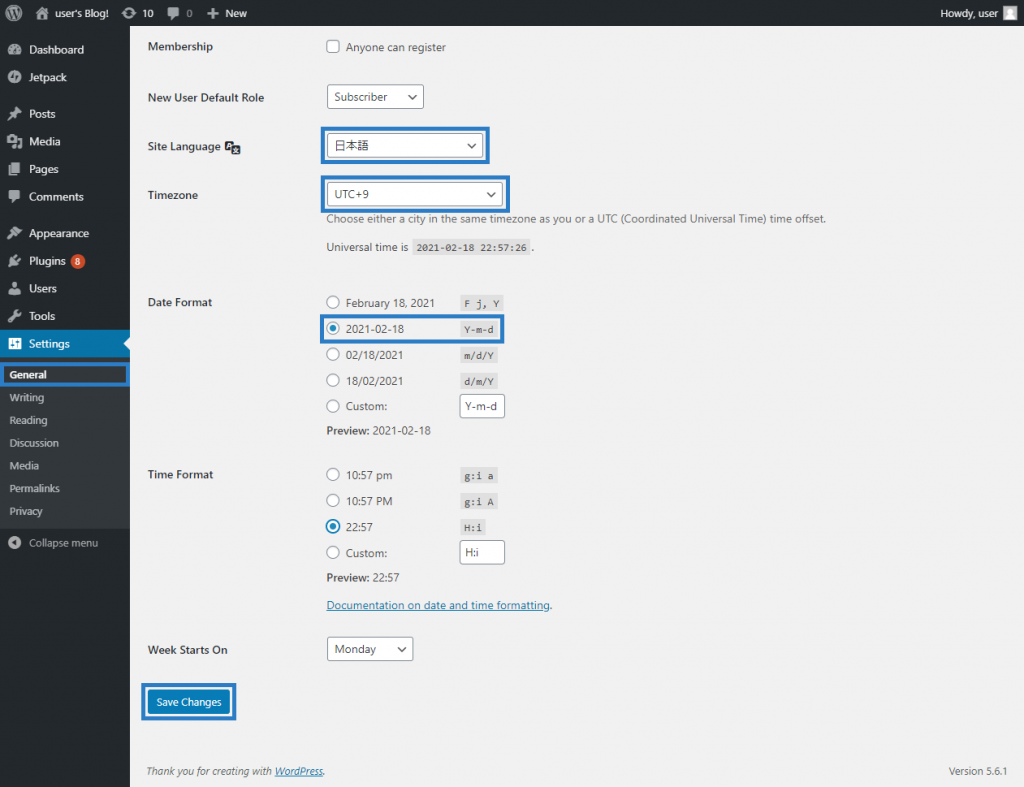
日本語化
初期状態だと恐らく英語になっているので、「Settings」の「General」から言語を変更します。また、Timezoneを日本のタイムゾーン「UTC+9」に変更しておきます。
Data Formatはお好みですが、デフォルトの表記は日本ではあまり馴染みが無いので変更しておいた方がいいでしょう。
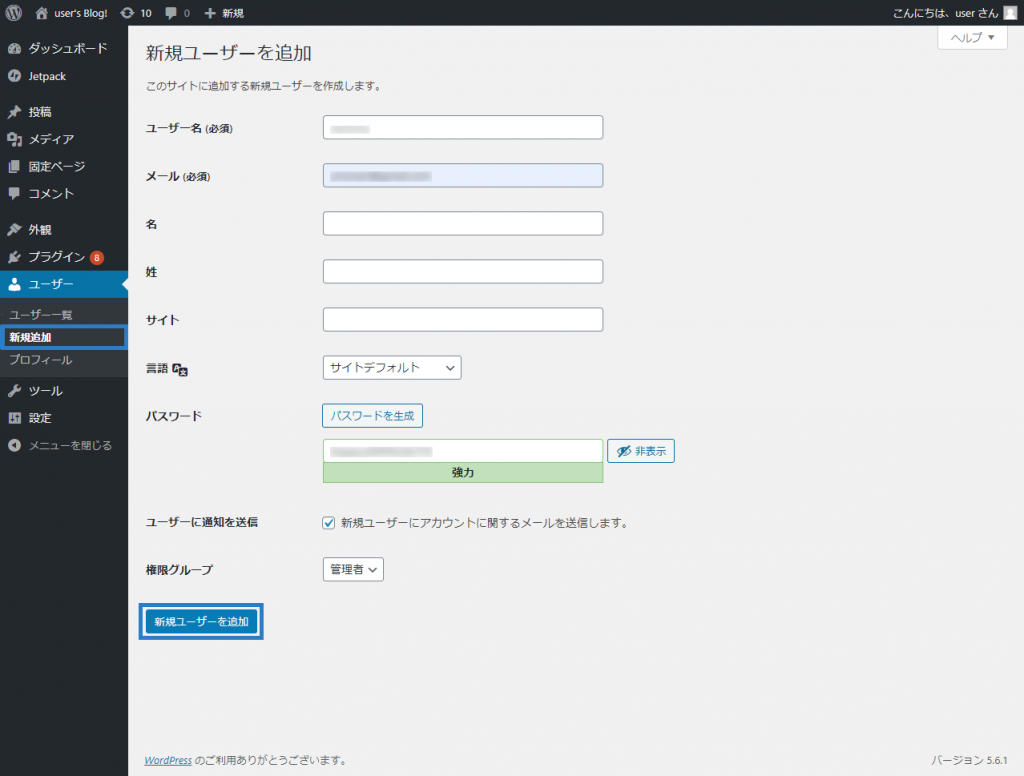
ユーザの作成
デフォルトユーザである「user」は誰もが知り得るユーザ名なので、セキュリティ上変更しておく必要があります。
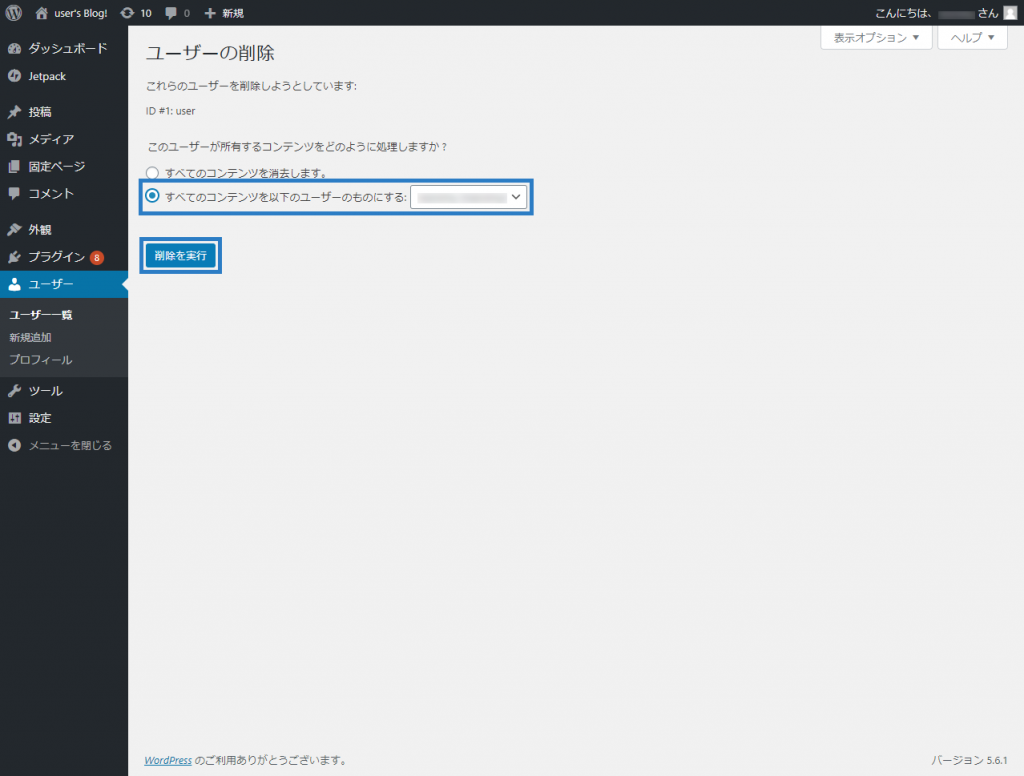
下図のように新規ユーザを作成してください。権限グループは「管理者」にします。
作成したユーザでログインした後に、ユーザ一覧からデフォルトの「user」を削除します。
この時「すべてのコンテンツを以下のユーザーのものにする」で先ほどのユーザを選択したうえで「削除を実行」をクリックしてください。
Bitnamiの非表示
LightsailでWordPressを構築すると、画面右下にbitnamiの「Manage」ロゴが表示されてしまいます。これはサイトにアクセスした全員に見えてしまうので、非表示にする必要があります。
Lightsailの管理画面からコンソールに接続し、以下のコマンドを実行します。
sudo /opt/bitnami/apps/wordpress/bnconfig --disable_banner 1
sudo /opt/bitnami/ctlscript.sh restart nginx
これでbitnamiのロゴが画面から消えます。
HTTPS化
Lightsail上のWordPressサイトをhttpsに対応させる方法は大きく分けて以下の2つがあります。
- ロードバランサに証明書を用意する
- サーバ自身に証明書を用意する
お勧めは2番です。1番はロードバランサ分の費用(18USD/月~)がかかるのに対して、2番は無料で実装出来ます。ただ、1番の方法はAWSの機能として実装できるのでマニュアルが豊富ですが、2番はbitnamiの操作なのでAWSのマニュアルが投げやりだったりします。
マニュアルが豊富とは言えませんが、サーバ自身で証明書を用意する場合、基本的にはコンソールから「sudo /opt/bitnami/bncert-tool」を実行するだけです。
bitnami@ip-0-0-0-0:~$ sudo /opt/bitnami/bncert-tool
An updated version is available. Would you like to download it? You would need to run it m
anually later. [Y/n]: y    # yを押下してアップデートする

The tool will exit now. To run the updated version run the following command:

/opt/bitnami/bncert-tool

bitnami@ip-0-0-0-0:~$ sudo /opt/bitnami/bncert-tool    # アップデート後にもう一度実行する
----------------------------------------------------------------------------
Welcome to the Bitnami HTTPS Configuration tool.

----------------------------------------------------------------------------
Domains

Please provide a valid space-separated list of domains for which you wish to
configure your web server.

Domain list []: hogehoge.io    # ドメイン名を入力

The following domains were not included: www.hogehoge.io. Do you want to add them?
[Y/n]: n

Warning: No www domains (e.g. www.example.com) or non-www domains (e.g.
www.example.com) have been provided, so the following redirections will be
disabled: non-www to www, www to non-www.
Press [Enter] to continue:    # 警告が出るがエンターを押下
----------------------------------------------------------------------------
Enable/disable redirections

Please select the redirections you wish to enable or disable on your Bitnami
installation.


Enable HTTP to HTTPS redirection [Y/n]: y    # yを押下しhttpsへのリダイレクションを有効にする


----------------------------------------------------------------------------
Changes to perform

The following changes will be performed to your Bitnami installation:

1. Stop web server
2. Configure web server to use a free Let's Encrypt certificate for the domains:
hogehoge.io
3. Configure a cron job to automatically renew the certificate each month
4. Configure web server name to: hogehoge.io
5. Enable HTTP to HTTPS redirection (example: redirect http://hogehoge.io
to https://hogehoge.io)
6. Start web server once all changes have been performed


Do you agree to these changes? [Y/n]: y    # 入力ミスがなければyを押下


----------------------------------------------------------------------------
Create a free HTTPS certificate with Let's Encrypt

Please provide a valid e-mail address for which to associate your Let's Encrypt
certificate.

Domain list: hogehoge.io

Server name: hogehoge.io

E-mail address []: hogehoge@piyo.com    # 適当なメールアドレスを入力

The Let's Encrypt Subscriber Agreement can be found at:

https://letsencrypt.org/documents/LE-SA-v1.2-November-15-2017.pdf

Do you agree to the Let's Encrypt Subscriber Agreement? [Y/n]: y    # yを押下


----------------------------------------------------------------------------
Performing changes to your installation

The Bitnami HTTPS Configuration Tool will perform any necessary actions to your
Bitnami installation. This may take some time, please be patient.

----------------------------------------------------------------------------
Success

The Bitnami HTTPS Configuration Tool succeeded in modifying your installation.

The configuration report is shown below.

Backup files:
* /opt/bitnami/apache2/conf/httpd.conf.back.202102182311
* /opt/bitnami/apache2/conf/bitnami/bitnami-apps-prefix.conf.back.202102182311
* /opt/bitnami/apache2/conf/bitnami/bitnami.conf.back.202102182311

Find more details in the log file:

/tmp/bncert-202102182311.log

If you find any issues, please check Bitnami Support forums at:

https://community.bitnami.com

Press [Enter] to continue:    # エンターを押下
これでサイトにhttpsでアクセス可能になり、httpはhttpsへリダイレクトされるようになります。
以上の手順でWordPressサイトの基本的な構築は完了です。後は煮るなり焼くなり好きにしてください。